I had been one of those people who didn't make bread. I just didn't. It was a complicated and delicate process and I just didn't have the knowledge or the discipline to be a bread maker. Besides, I thought, I'm too young to make bread. I have a life. There'll be plenty of time for that later when I have nothing to do but cook and clean and well, make bread.
Then I watched as the teacher showed, right in front of my eyes, how to make the most mouth watering, light and fluffy crescent rolls you've ever put in your mouth. It really was a simple process. Sometimes, it takes seeing something done right in front of you before you can actually imagine yourself doing it. That's what I'm going to do for you. After this post, you're going to be able to make yeast crescents for Thanksgiving and the only thing you'll regret is that your family will volunteer you to make them every Thanksgiving until the end of time.
Let me introduce the players...
Start by pouring the milk into a microwaveable container and adding the sugar. Heat it in the microwave for about a minute and half.
See there. No good. This yeast has left the building. No life whatsoever. So I went to the store and got a new packet of yeast. Yeast is one of those things that you can't really keep on hand. That's why you test it.
Here's the second batch I did. This yeast is obviously alive and kicking and ready to make some bread rise! See that foamy consistency around the edges? That means that this yeast is happy and healthy and good to go.
Now, pour your milk mixture into a large bowl and stir to combine.
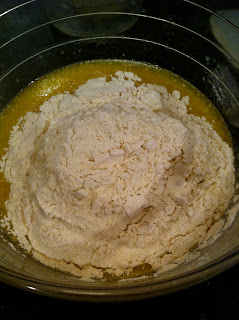
and then add the rest.
See what a nice looking ball of dough that is!
At this point, you want to cover it up and give it some alone time. During that time, if the yeast was good, the dough should double in size. I'm not sure how long this takes because I always leave it overnight, but if you're doing this all in one day, it'll probably take a couple of hours depending on how warm it is in your kitchen. I had mine sitting on the kitchen counter and then Mr. Park built a big fire in the fireplace and we went to bed. One time, I got up in the morning to check on my dough and it had risen so much it was overflowing onto the counter, so if you think it may be too warm in your kitchen, you can cover it and put it in the icebox and then set it out in the morning to rise some more if it needs it.
I'm about to go check on the dough to see if it's ready to roll out so come back later today and I'll have the rest of the recipe up. It's gonna be delicious!


No comments:
Post a Comment